Yamaha YPJ MT-Pro eBike battery cover tool free removal mod
Okay, so back when I did my original review of the YPJ-MT Pro, I said that one of the most bothersome things about it was the lack of removable battery. Yet I have to admit, that isn't strictly true - you see, the battery is of course removable - just not conveniently.
You have to remove two security Torx bolts which hold the black plastic mud guard/battery cover on, and then once that is gone, there is a larger bolt neat the bottom of the battery that you have to loosen, which will allow you to turn a spring loaded locking lug out of the way so that you can then remove the battery.
Honestly, because locking lug is spring loaded, it's basically not going to turn on its own, which means you don't really even need the last bolt. It's there just to make double sure that when you take a huge jump across a cliff or something, that the battery has no way to come out, no matter how much G force it is subjected to.
(Also, even if the battery did come out, it would still be held in by the plastic cover).
I wanted to start with the plastic cover. The cover is in fact not even strictly necessary, but I suppose that having it in place to protect the battery from Mud, etc. is a good thing.
Another thing to mention is that I get the distinct impression that the threads in the bolt holes were wearing heavily every time I removed the bolts from frame to remove the cover - this means that even if I didn't mind carrying around the Torx bit, it probably wouldn't be a great idea long term.
The first thing I thought about was "Magnets". I reasoned that if I could find some strong rare earth magnets, those would hold it on just fine - but still be easy to remove. I knew I would have to test it by doing some jumps and running up and down some stairs - but such is the price we pay for science.
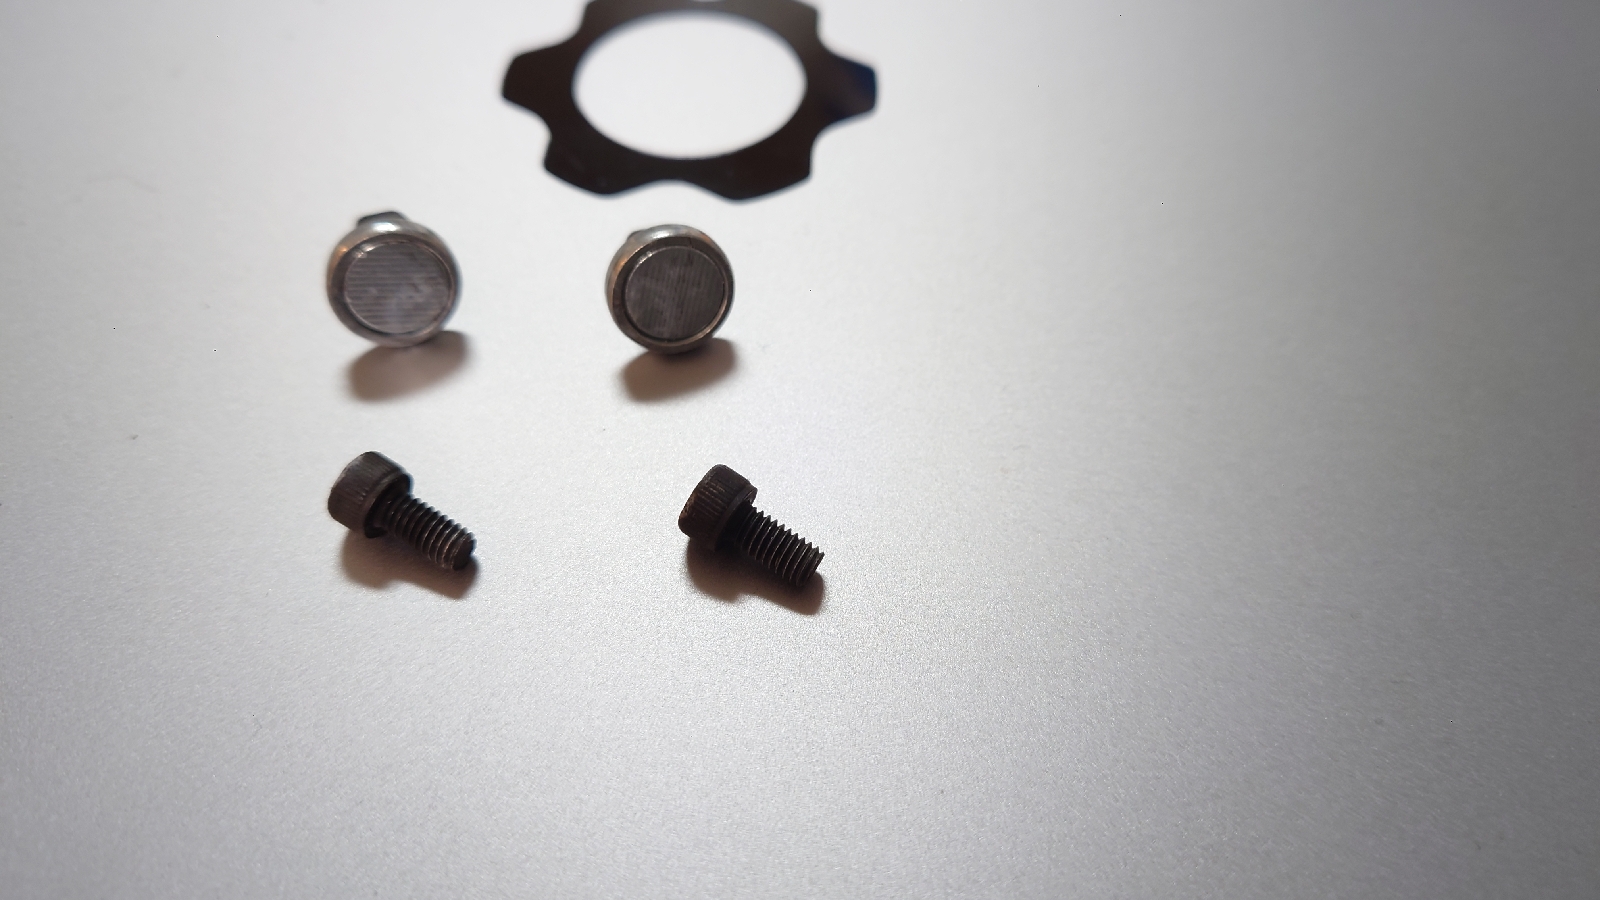
The bolts are M4, so I looked for M4 magnet bolts. The closest thing I could find were the ones in the photo below below (on the top). They have an M4 thread, and a flat magnet. These are designed to screw into the back of LED signs, and then stick to a metal wall.
Not only do they have an M4 thread on one end and a magnet on the other end, they even come in positive and negative pairs - meaning they will stick to each other very very well!
There is a problem with these, however, the thread doesn't go the entire way up the bolt, so there is a stand-off designed into these. I suppose that makes sense for sign holding applications, where you might want to give a 5mm or so gap for cooling.
Here you can see I attached the magnets to the mud guard using M4 bolts on the other side.
Here is the other side with the nuts:
Here I used normal M4 hex bolts (not the original Torx ones from Yamaha). I couldn't use the magnets here, because it turns out they stick out way too far. Since these bolts are steel, they give the magnets something to stick to.
You can see that even with only one set of magnets, this leaves an ugly gap between the mud guard and the frame.
I rode around a bit and didn't manage to make the cover fly off, so it was surprisingly secure. The large gap just didn't sit well with me. What's more, things started corroding after only a few days.
I decided to try another approach, something closer tot he original design.
I found some stainless steel "All Screws", or I suppose they are really just threaded rods. The ones I got are 20mm, though I suppose 18mm or so would be ideal. These are almost too long. I purchased the stainless steel thumb-screws separately.
The idea is that instead of unscrewing the bolts every time and wearing out the bolt holes in the frame, we put in these double-ended bolts, and from now on we just use thumb-screws on the outside of the case.
Here is the frame after screwing the bolts in part way. (Note I had to do this a few times to get the angles right, the holes are a bit particular).
Once the bolts were inserted, I tightened them in a bit using a pair of pliers and a sheet of hard rubber to allow good grip and prevent from damaging the threads.
It was a bit of a stretch to get the cover back on, so again, probably 17mm or 18mm would be ideal, as 20 is long enough that it is a tight fit to get the bolts through the holes and be able to close the cover.
The photo below shows the cover closed and the thumb-screws closed about a single turn.
These thumb-screws are not ideal, I will look for a set that has a thinner part at the bottom and a larger part at the top so that they will fit in the hole in the plastic a bit easier while also being easier to grip.
Still, they work fine, they don't require tools, and they won't rust.
Next, I will look for a wing nut or gnarled knob for locking mechanism at the bottom of the battery.


コメント
コメントを投稿